Wednesday, 24 May 2017

Common Mistakes in Graphic Designing

Sometimes, there are various common mistakes that we designers do which decrease our reputation in the market no matter how good we are in our field. So, here are a few common mistakes discussed below to always keep in mind while designing brochures, graphic, pamphlets, business cards, posters, flyers etc.

Readability
  • The content on image or the pure content should be readable.
  • Use fonts which are not too fancy and are easy to read, just keep it simple.
  • The content should be contrasted to the background if used on the image so that it can be read easily.


Fonts
  • Limit on use of font and type face like 2-3 only.
  • Do not use all caps.
  • It should not be neon colors on light backgrounds.
  • Use matching fonts.


Grammatical  Mistakes 
  • Check the spelling mistakes in the content before handing over your work to the client.
  • Also, check the grammatical mistakes as this can harm your reputation.


Color Palette
  • Use logical color palette.
  • Always consider color wheel.
  • Use of proper colors in proper place.


Content and Audience
  • Make your design strictly according to the content.
  • Always design for your audience.


Word Spacing
  • The spacing between the words should be equal.
  • Do not forget to do kerning.
  • Keep line length short.
  • Always use SHIFT+ENTER while changing lines in a paragraph.


Alignment
  • Check the alignment before finalizing it.
  • Have purposeful hierarchy.


Supporting Graphics
  • Use the graphics or images according to the topic of your project.
  • Supporting graphics should be eye- catching.


Grid and Guides
  • Use Grid for equal width for rows and columns.
  • Use smart guides to make work easier.


Final Check

  • Do the final check on your project before handing it to your client or publishing for your own purpose.

Monday, 24 April 2017

Coral Reefs

Coral reefs images
Coral reefs

Today’s theme for illustration is the Coral Reefs in the Ocean.

Coral reefs are the most beautiful habitats, thousands of unique and valuable species of plants and animals. It is a most magnificent part of nature.

The illustration shows the beautiful part of underwater environment, different kinds of beautiful fishes and colorful plants.

The tools used in the above illustration are mesh tool, gradient colors and some effects. The colors are mainly bright ones.

The fishes are made with the help of pen tool by sketching on paper and then tracing them and coloring is done with the help of mesh tool.

In the coral reefs, gradient colors are used.

In the water, first gradient colors are applied and then effects from effect gallery are used i.e., grains and accented edges.


Tuesday, 18 April 2017

Flat Design Logo Illustrator Tutorial


Today’s tutorial is about the logo of a coffee mug.

logo design
Flat design logo

Step 1
Open illustrator, Go to file - new – click ok.
illustrator tutorial

Step 2
Make a circle with the help of an Ellipse tool for background by holding the shift key. Fill solid color in it and lock it (object- lock- selection).
illustrator tutorial

Step 2
Make a rounded rectangle for mug with stroke, see the stroke type in the below image. Fill solid color in it.
illustrator tutorial

Step 4
Make an ellipse with the help of Ellipse tool above the rounded rectangle with same color and stroke.
illustrator tutorial

Step 5
Now, for the handle of the mug, make a rounded rectangle with stroke only. Make stroke of 5 pt.
illustrator tutorial

To highlight the handle, make another rounded rectangle with stroke only, but, of white color, around 0.5 pt size and choose stroke style.
illustrator tutorial

Step 6
Make additional details on the mug like rounded rectangle and ellipse, fill white color and decrease its opacity to 50%.
illustrator tutorial

Step 7
We will make  a heart on a coffee mug, so, for this, make a circle with the help of Ellipse tool by holding the SHIFT key, fill red color with stroke of white color.
illustrator tutorials

Step 8
Now, select Direct selection tool (A), click on upper and lower anchor point of the circle and click on Convert (Convert selected points to corner) in the option bar.
Click on an upper anchor point and drag it downwards to make the shape of the heart. Place it accordingly and the coffee mug is ready.
illustrator tutorials


Step 9
For the shadow of the mug, make a rectangle, fill black color and decrease its opacity to 10%. Rotate it according to the mug.
illustrator tutorials

Select background and rectangle, select Shape Builder Tool, click on the shadow area outside the background, select area and delete, place the shadow below the mug.
illustrator tutorials


Logo of a coffee mug is ready.
logo design

Monday, 10 April 2017

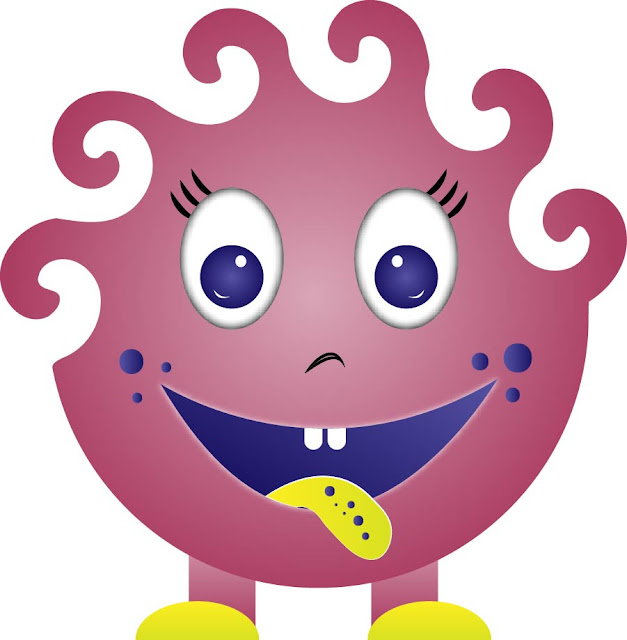
Cartoon Illustrator Tutorial

monster images
Monster

Step 1
Open illustrator, go to File - New – Click OK.
illustrator tutorials

Step 2
Make a circle with the help of Ellipse Tool by holding the SHIFT key. Fill gradient colors of type radial.
illustrator tutorials

Step 3
Select Twirl Tool and click on the various positions of the circle to make twirl pattern like in the image below.
illustrator tutorials

Step 4
For the eyes of a monster, make an ellipse using Ellipse Tool, fill white color, go to Effects – Stylize – Inner Glow, select black color, set the blur, select edge option and click OK.
illustrator tutorials

Step 5
Make another ellipse inside it and fill gradient colors of radial type. Make additional details to highlight the eye and fill white color. Group them all (CTRL+G).
illustrator tutorials

Step 6
Draw curve using Pen Tool only with stroke for eyelashes, change the shape of the stroke from the panel, copy it by holding the ALT key and drag it and group all parts of eye by CTRL+G.
illustrator tutorials

Step 7
Select it and double click on Reflect Tool, choose vertical and click copy. Move the eye to the appropriate distance and eyes are ready.
illustrator tutorials

illustrator tutorials

Step 8
Draw the shape of the mouth and fill similar gradient colors as in the eyeball of the monster’s eye.
illustrator tutorials

Select it and go to Effects – Stylize – Outer Glow, choose the white color and set blur.
illustrator tutorials

Step 9
Now, make the shape of a tongue coming out of the mouth, fill gradient colors, set the angle and stroke of white color, see the stroke shape.
illustrator tutorials

Step 10
Make nose and teeth of the monster and make some additional details.
illustrator tutorials

Step 11
For the legs of the monster, make a rectangle and fill gradient colors.
Make the shape of the shoe and fill the same gradient colors as in the tongue of the monster. Use Eyedropper Tool to make it fast. Group them by CTRL+G.
illustrator tutorials

Step 12
Now, select it and press O on the keyboard and double click on Reflect Tool, choose vertical and click copy
illustrator tutorials

Move this leg to the appropriate distance and legs are ready and so is our little monster.
monster images


Sunday, 2 April 2017

Glass Illustrator Tutorial

Today’s tutorial is about making juice glass in illustrator.

Glass images
Glass

Step 1
Open illustrator, go to File - New – click OK.
illustrator tutorials

Step 2
For background, draw a rectangle, fill black color in it and lock it.
illustrator tutorials

Step 3
Draw the shape of the glass with the help of Pen Tool and fill gradient colors lie below in the image.
illustrator tutorials

Step 4
Make the shape of the lower part of the glass and fill gradient colors of gray shades with the stroke of it like below in the image and decrease its opacity to 70%.
illustrator tutorials

Step 5
Make additional details on it and fill color.
illustrator tutorials

Step 6
Now, make the upper part of glass like below with stroke, fill gradient colors and decrease the opacity to 30%.
Draw the edge of the glass and don’t fill color only the stroke.
illustrator tutorials

Step 7
Make additional details on glass like below and fill white color in it. Decrease opacity to 70%. If you want to smooth those details then simply go to Smooth Tool and drag on points which require smoothness.
illustrator tutorials

Step 8
To make the bubbles in the glass, draw circles of different shapes with the help of Ellipse Tool and holding the SHIFT key. Fill gradient colors of radial type.
Select all and go to Effects – Stylize – Outer Glow, set the blur and choose white color and click OK.
illustrator tutorials

Decrease it’s opacity to 70%. Group them CTRL+G and copy by holding the ALT key and place above the glass.
illustrator tutorials

Step 9
To make ice cubes, draw a square by the Rectangle tool by holing SHIFT key and fill gradient colors. Go to Effects – Stylize – Outer Glow, set the blur and choose white color and click OK. Decrease it’s opacity to 70%. 
illustrator tutorials

Copy by holding the ALT key and place the ice cubes above the glass.
illustrator tutorials


Juice Glass is ready. Make juice of different colors.
glass images


Monday, 20 March 2017

Character Design

Character Design of a Penguin

Character design
Penguin

Step 1
Open illustrator, go to File - New – Click OK.
illustrator tutorials

Step 2
Draw the shape of the penguin with the help of Pen Tool or you can draw it on paper, scan it, place it and draw it with the pen tool.
illustrator tutorials

Step 3
Fill black color in the body of penguin.
illustrator tutorials

Step 4
Fill white color in the inner part of the body of penguin.
illustrator tutorials

Step 5
Select inner part, go to Effects – Stylize – Inner Glow.
Select mode to normal and select black color which is to be the color of inner glow, set the blur, select edge option and click OK.
illustrator tutorials

Step 6
Now, for feet of the penguin, select color and go to Effects – Stylize – Inner Glow. But this time, choose the white color and select option center.
illustrator tutorials

Step 7
Copy the feet by holding the ALT key and drag the feet, place it under the feet like in the image and fill color, little darker without the inner glow effect. Group them (CTRL + G).
illustrator tutorials

Step 8
For other feet, Press O and double click on Reflect Tool, dialog box will appear, click on vertical and click on copy. Move the feet to the appropriate distance and feet are ready.
illustrator tutorials

Step 9
Make inner part of hands, fill white color and go to Effects – Stylize – Inner Glow. Choose the white color and select option center.
Using reflect tool make another part as we have done in above step.
illustrator tutorials

Step 10
Make additional details on the stomach of penguin using pen tool, fill color and blur it, Effects – Blur- Gaussian Blur (set the blur) – Click OK.
illustrator tutorials

Step 11
Now, for the eyes of a penguin, make an ellipse using Ellipse Tool, fill white color, go to Effects – Stylize – Inner Glow, select black color, set the blur, select edge option and click OK.
illustrator tutorials

Make another ellipse inside it and fill black color, make two circles to highlight the eye and fill white color. Group them all (CTRL+G).
Select it and double click on reflect tool, choose vertical and click copy. Move the eye to the appropriate distance and eyes are ready.
illustrator tutorials

Step 12
For the beak of the penguin, fill color as in the image, for upper and lower part of the beak, go to Effects – Stylize – Inner Glow. Choose the white color, set different blur for both upper and lower part and select option center and click OK.
illustrator tutorials

Step 13
And finally, make additional details on the beak using pen tool, fill white color and decrease opacity to 30%.
illustrator tutorials

Our cute little character design is ready.

character design