Monday, 27 February 2017

Environment Illustration

Save Environment, Save Environment, Save Environment, these are the two words which we always chant, but few cares and implement some methods.

Today’s illustration is about the ENVIRONMENT, the illustration depicts what we are doing  to our planet and the consequences we are facing and will face.

Environment
Save Environment

I made a simple illustration without using many tools of illustrator, just the use of pen tool and solid colors.

In the above illustration, in the middle, I made the greenery part, which includes trees, grass, river of clean water, small houses, pure air to breathe, cleanliness everywhere. No pollution of any kind.
But, I give this the blurry effect because we are destroying this greenery and our environment.

The two persons in the illustration depicts that we are pushing this environment into extinction.

The left side of the illustration shows that we are making tall building by cutting down the trees which causes landslides in hilly areas. We are travelling in costly vehicles which cause air pollution and its horns cause noise pollution.
It also shows the hoarding of SAVE ENVIRONMENT but, who cares.

The right side of illustration shows how the factories and industries are polluting the environment by releasing the smoke into the air and by dumping the waste directing into rivers which includes harmful chemicals causing water pollution.

By doing this we are interfering in nature which results in different kinds of pollution, which affects our health and also creating man-made disasters. So, we better care for our planet before it disappears. 

Stop Screaming and Start Doing

Friday, 24 February 2017

Mesh Tool Illustrator

mango images
Mango

Today’s tutorial is on the use of the Mesh Tool in illustrator. This tool is very important part of the illustrator. We use different colors in one part of the image by gradient colors, but, there is a limitation that we can use it linearly or radially but, by mesh tool we can use different colors at any point and we can make beautiful things with the help of this tool which gives the realistic effect.
 I will explain mesh tool with a basic shape. So, let’s start.

Step 1
Open illustrator, go to File - New – Click OK.
illustrator tutorials

Step 2
Draw the shape of the mango with the help of Pen Tool or you can draw it on paper, scan it, place it and draw it with the pen tool. Fill solid color in it.
illustrator tutorials

Step 3
Select mango, go to Object- Create Gradient Mesh- (change number of rows and columns) Click OK.
illustrator tutorials

Step 4
Select swatch palette of Fruits and keep it near to the mango to make it easy.
illustrator tutorials

Select Lasso Tool, drag mouse around the points on which you want to change colors, after the points get selected, choose color from palette and click on it.
illustrator tutorials

Repeat above step by selecting different points and selecting different colors and give a realistic look.
illustrator tutorials

Step 5
Make additional details of mango with the help of Pen Tool like below image.
illustrator tutorials

Step 6
For the shadow of a mango, go to Effects- Stylize- Drop Shadow. Manage settings and Click OK.
illustrator tutorials


 Mango is ready
mango images

Practice more and more to have command on it. 

Monday, 20 February 2017

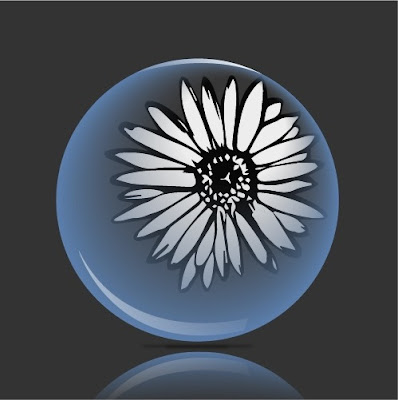
Bubble Adobe Illustrator CS6 Tutorials

Bubble Design by using blend mode.


bubble images
Bubble

Step 1
Open illustrator, go to File - New – Click OK.
illustrator tutorials

Step 2
Draw a square for the background and fill dark color, lock it.
illustrator tutorials

Step 3
Draw a Circle by selecting Ellipse Tool, drag while holding Shift Key, fill solid color.
Draw another Circle (small) inside it and fill solid white color, see below image.
illustrator tutorials

Select both circles and select Blend Tool, click on circle one after another to create the Blending Effect.
Decrease Opacity to 10%.
illustrator tutorials

Step 4
Draw shapes like below to create a shining effect, draw shapes like below with the help of Pen Tool and fill gradient black and white color. Select them, go to Windows- Transparency (option bar opens), change mode to Screen i.e. Blending Mode and decrease Opacity to 50%, if required, do not decrease opacity.
Select all, Group them (CTRL+G) and lock it.

illustrator tutorials

Step 5
Now, place the image, go to File- Place (select image whichever you want, I selected the image which is one of my drawing works) - OK.
Click on Embed and then Image Trace.
illustrator tutorials

Now, click on the Expand. Select image, right click- Ungroup, and delete unnecessary part.
Put the image behind the bubble, adjust shape and position. Group it with bubble.
illustrator tutorials

Step 6
For the shadow of the bubble, draw an Ellipse, fill black color, go to Effects- Blur- Gaussian Blur-(change settings)OK.
illustrator tutorials

Step 7
For the reflection of bubble, select the bubble, for Reflect Tool, Press O, double click on reflect tool (option bar opens), check on the horizontal and click on copy option. Move the copied image just below the original image.
illustrator tutorials

Step 8
Draw Rectangle on copied image (area which you want to be reflected) like below and fill gradient black and white color (Linear and 90 degree angle). Select the reflected image and rectangle, go to Windows- Transparency- Click on Make Mask.
illustrator tutorials


And that’s it.
bubble images

Friday, 17 February 2017

Adobe Illustrator CS6 Tutorials

This tutorial is about use of gradient colors in a lipstick design.


lipstick images
Lipstick

Step 1
Open illustrator, go to File - New – Click OK.
illustrator tutorials

Step 2
Draw a rectangle for background and fill with light gradient colors, lock it.
illustrator tutorials

Step 3
Now, we will start making lipstick by its tip, draw an Ellipse by selecting Ellipse Tool, fill solid color.
Draw another Ellipse inside it and fill solid color, little bit light color compared to the previous color.
Select both ellipses and select Blend Tool, click on ellipse one after another to create the Blending Effect.
illustrator tutorials

Step 4
To give the tip of lipstick Shining Effect, draw shapes like below with the help of Pen Tool and fill gradient black and white color. Select them, go to Windows- Transparency (option bar opens), change mode to Screen i.e. Blending Mode and decrease Opacity to 70%. The tip is ready.
illustrator tutorials

Step 5
Now, draw Rectangle and alter it by Direct Selection Tool (A), fill solid color.
illustrator tutorials

Step 6
We will also make it shine, for this, draw 2 Rectangles and fill gradient black and white color. Select them, got to Windows- Transparency (option bar opens), change mode to Screen and decrease Opacity to 60%.
illustrator tutorials

Step 7
Again, draw Rectangle and fill gradient colors, like metallic colors, so that it looks like a metal.
illustrator tutorials

Step 8
Draw a shape like below and fill solid black color to create depth and to make it more realistic.
illustrator tutorials

Step 9
For the lower part of lipstick, draw Rectangle and fill with dark gradient colors.
Repeat Step 8 for it too on both sides of the rectangle.
illustrator tutorials

Step 10
Now, we will make cap of lipstick, simply draw Rectangle and fill same gradient colors as in the lower part of lipstick.

Step 11
Draw an Ellipse above the rectangle, fill solid color and stroke of dark color.
illustrator tutorials

Step 12
For shadow, tilt them, draw an Ellipse, fill black color, go to Effects- Blur- Gaussian Blur-(change settings)OK.
illustrator tutorials

And lipstick is finished.
lipstick images


Monday, 13 February 2017

Typography Illustrator Tutorial

Butterfly images
Typography on Butterfly

Today’s tutorial is about the typography in illustrator. In this tutorial, firstly we will make butterfly and then we will do typography on it.
Step 1
Open illustrator, set up the document see below, go to File - New – Click OK.
illustrator tutorials

Step 2
Draw rectangle with the help of Rectangle Tool and fill color for background because we will make a butterfly with light color so, to highlight it, we will make a background.
illustrator tutorials

Step 3
Draw the shape of butterfly with the help of Pen Tool or you can draw it on paper, scan it, place it and draw it with the pen tool.
Copy this butterfly by pressing ALT key and drag it and keep it aside.
illustrator tutorials

Step 4
Now, make the background hollow. Select background and the butterfly, go to Object- Compound Path- Make.
illustrator tutorials

Step 5
Move the copied butterfly that we kept aside in the hollow space of background and fill solid color in it. Decrease it’s opacity to 40%, that’s why we made hollow background, Lock it (Object- Lock- Selection).
illustrator tutorials

Step 6
For the shadow of a butterfly, go to Effects- Stylize- Drop Shadow. Manage settings and click OK.
illustrator tutorials

Step 7
To make designs on butterfly, draw Square by selecting the Rectangle Tool, press and hold the Shift key and drag it. Fill color with stroke of dark color.
Go to Effects-Distort and Transform- Pucker and Bloat. Drag the slider to Bloat side.
illustrator tutorials

Step 8
For shadow of this design, go to Effects- Stylize- Drop Shadow- Click OK.
Copy this design on butterfly at random place by rotating and changing its size. Select all and decrease the opacity to 30%. Group them CTRL+G and lock it.
illustrator tutorials

Step 9
 For typography, select Type Tool, drag the cursor (it will create a box), choose font type and font size and write what you want.
Step 10
 After writing, select it, go to Type- Create Outlines, to alter the letters, like you can change the size of fonts.
illustrator tutorials

Step 11
Now, go to Object-Envelope Distort- Make with Mesh. Select number of rows and columns accordingly and click OK.

illustrator tutorials

Step 12
To alter the letters, select it and click on the Direct Selection Tool (A). Double click on mesh point and drag it according to the shape of a butterfly. Double click on mesh points one by one to form the shape.
illustrator tutorials


Write some more things and adjust them and here’s typography on the butterfly.
butterfly images